In this section, you will add support for Sass. This is not essential for applications built with Razor Pages. However, Sass is a design-time tool that helps you to organise and maintain your CSS files. During this section, you will add some styles which are designed to work with form validation that you will put to use in the next section when you build a form. If you prefer not to use Sass, skip to the end of this section for the plain CSS version of the validation styles.
Sass (Syntactically Awesome Style Sheets) is a is a scripting language that is used to generate cascading style sheets (CSS files). Its syntax is very similar to CSS itself (valid CSS is actually valid Sass), but it supports the use of variables, nesting, mixins and selector inheritance, none of which are available in CSS itself. However, these features help you to organise and maintain your web application's styles and improve your productivity.
If you are new to Sass, I advise you to check the official guide for a great introduction to using Sass in your application. You will be working with Bootstrap Sass variables in this exercise.
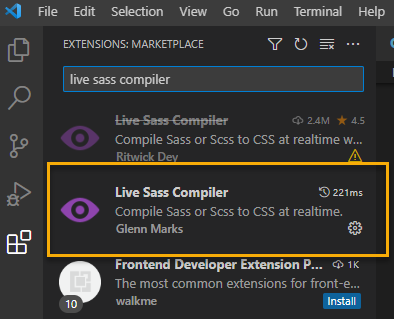
In order to get the benefits of Sass, you need a Sass compiler - a tool that processes your Sass files and produces the CSS files that the browser understands and can use. You can compile Sass from the command line once you have Sass installed, or you can use an extension to manage this process when working in VS Code. Live Sass Compiler is one of the most popular Sass compilers for Visual Studio Code. Search for "live sass compiler" in the Extension marketplace and then install the extension:
Once installed and enabled, go to File > Preferences > Settings and then search for "live sass compiler" again, or locate Live Sass Compiler under the extensions node in the Commonly Used pane. You should be presented with the settings editor for the extension.
Some settings can be set directly from the screen that appears, but most of them require editing in the settings.json file. Click on Edit in settings.json and add the following:
"liveSassCompile.settings.formats": [
    {
        "format" :"expanded",
        "extensionName": ".css",
        "savePath": "~/"
    },
    {
        "format" :"compressed",
        "extensionName": ".min.css",
        "savePath": "~/"
    }
],
"liveSassCompile.settings.excludeList":[
    "/**/lib/bootstrap/dist/scss/**"
],
This configures two output formats: the first produces standard css files with white space and indentation. The second produces the minified version for use in production. Both have a savePath setting of ~/, which represents the location of the .scss file being compiled. Guidance on further settings and commands is available at the Github site for the extension project. The settings above also configure an exclusion for the ccompiler. Files in the wwwroot/lib/bootstrap/dist/scss folder will not be included as part of processing. There are no files there at the moment. You will add some next.
Using Bootstrap Sass
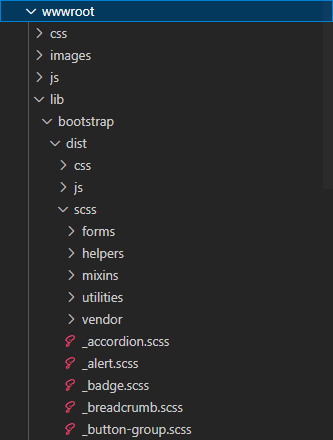
Download the Bootstrap source files (https://github.com/twbs/bootstrap/archive/v5.2.3.zip) and then unzip the scss folder and its contents to wwwroot/lib/bootstrap/dist/ so that the resulting folder structure looks like this:
Next, rename the site.css file to site.scss. Then add the following two lines to the top of the file to import the Bootstrap Sass functions and variables:
@import "../lib/bootstrap/dist/scss/functions";
@import "../lib/bootstrap/dist/scss/variables";
Add the following style declarations to the file. They use Bootstrap colour variables ($red-200 and $red-500):
.input-validation-error,
.input-validation-error:focus {
  background: $red-200;
  color: $red-500;
}

.input-validation-error:focus{
  border-color: $red-500;
  box-shadow: 0 0 0 0.2rem $red-200;
}

.field-validation-error,
.validation-summary-errors {
  color: $red-500;
}
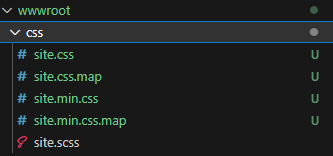
To activate the compiler, click on Watch Sass in the status bar at the bottom of the code editor:

The status should change to "Watching", and you should see a number of new files created in the css folder:
The generated css file contains hex colours in place of the variables in the scss file:
.input-validation-error,
.input-validation-error:focus {
  background: #f1aeb5;
  color: #dc3545;
}

.input-validation-error:focus {
  border-color: #dc3545;
  box-shadow: 0 0 0 0.2rem #f1aeb5;
}

.field-validation-error,
.validation-summary-errors {
  color: #dc3545;
}/*# sourceMappingURL=site.css.map */
Now that you have some validation styles, you can put them to use when you build an order form in the next section.
Next: Working with Forms
Previous: Working With Data
