Bakery Tutorial
This is part of a tutorial series that shows how to build a data-driven web application using Visual Studio Code, ASP.NET Core Razor Pages, Entity Framework Core and SQLite and .NET 7.
The source code for the completed application is available on GitHub
Create a new Web Application
Once you have installed the .NET SDK, you can use the .NET CLI to generate a starting point for a Razor Pages web application.
Create a folder to house your application files. You can do this in any way that you like. You can manually create the folder, and then open it in VS Code, or you can open VS Code and use its integrated terminal to create a directory with the standard
mkdircommand. The terminal in VS Code is accessed by pressing Ctrl+' (or ⌘+' on a Mac). In any event, the folder should be named Bakery.Open the folder within VS Code.
Ensuring that the terminal's active location is in the Bakery folder, you will use the ASP.NET Core templating system to create the the app. Templates are invoked in VS Code by executing
dotnet newcommands in the terminal, followed by the name of the template you want to use and any options. The name of the Razor Pages web application template iswebapp. You see all of the other available templates by typingdotnet new list. So create the new Razor Pages application with the following command:dotnet new webappNote that the command
dotnet new razorwill also result in a Razor Pages project being created.IMPORTANT
The project takes its name from the folder in which it is created. Ideally, you want this to be "Bakery" with a capital "B". That way, if you want to copy and paste code from this series into the project that you create, you will minimise the possibility of errors creeping in via mixing the case of the project namespace. If you use the terminal to navigate to the Bakery folder once it has been created and use all lowercase (e.g.
cd c:\bakery), the resulting project - and its default namespace - will have a lowercase "b".Once you have created the application, the
dotnet restorecommand is automatically executed. This results in dependencies and tools required by the project being restored. If this is your first .NET Core application, this command can take a little while to complete while the relevant packages are obtained from the Nuget package manager and stored locally on your machine. Once completed, you can open the Bakery folder from within VS Code to see the files and folders that were created.At this point, you will probably be prompted to add missing assets required to build and debug the project:
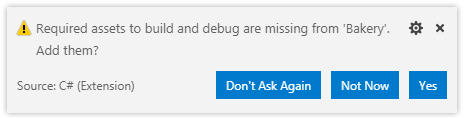
Click Yes.
The File and Folders
Before moving on, we shall review the files and folders that the template generated:
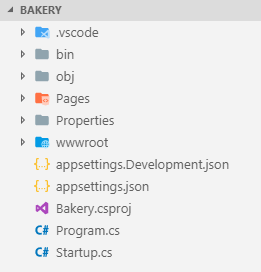
The .vscode folder was generated when you clicked Yes in the previous step. It contains files that provide configuration for debugging the application.
The bin folder contains the output of a Build operation - the compiled binaries for the application. There is nothing much there at the moment - just a folder named Debug containing another folder named net7.0. The application has not been compiled (built) yet. That will happen soon.
The obj folder contains a variety of files. You will hardly ever need to access this folder, except to perhaps delete its contents entirely. It is used by the framework as a place to store temporary files and other objects used in the build process.
The Properties folder contains a file called lanchSettings.json. This is a configuration file for launching the application in a browser.
The root of the application consists of 5 files. There are two JSON files named appsettings. These contain application-specific configuration information. Currently, they contain basic logging and host filtering configuration. Later, you will use appSettings to store database and email configuration, The version with Development in its name will only be used when the application is running in development mode.
The .csproj file is the standard MS Build XML-based project file. It contains project settings and references to files used by the project. MS Build uses this file to configure the actual build process of the application.
All ASP.NET Core applications are actually .NET console applications. The default entry point into any console application is the
Mainmethod in theProgramclass found in the Program.cs file. TheMainmethod in this case along with the class definition are absent as a result of a feature added to .NET 6 referred to as a minimal hosting model. The Program.cs file is responsible for configuring a web host and a middleware pipeline for the application and launching it so that it is ready to serve requests. It is also the place where you register services with the dependency injection system.The wwwroot folder houses static files - images, JavaScript files, CSS files etc.
Finally, the Pages folder. This is the default location for Razor Pages. The template site includes three: Error, Index and Privacy. You will add to this shortly.
Build And Run The Application
Now you are ready to launch the application. Execute the following command:
dotnet run
The site should build and be available to browse at a localhost URL on a specific port number. In the download version that accompanies this tutorial, the port number is 5054.
NOTE
The port number varies from project to project. When referring to URLs in this tutorial series, I will retain the port number for the sample application. If you are following along, you can alter the port number of your application within the launchSettings.json file if you prefer. Look for the profiles section and adjust the applicationUrl values for the http and, optionally, the https profiles accordingly.
If you want to run your application against the https profile, and you are a first time user of .NET, you will need to trust a self-signed certificate that is required for hassle-free browsing of your site over HTTPS on your local system. The certificate itself is installed as part of the SDK. To trust the certificate, execute the following command in the terminal:
dotnet dev-certs https --trust
To run the application using the https profile, use the -launch-profile (or -lp) option and pass in the name of the profile:
dotnet run --launch-profile https
You should get the following confirmation in the terminal from the built-in logging provider:
info: Microsoft.Hosting.Lifetime[14]
      Now listening on: http://localhost:5045
info: Microsoft.Hosting.Lifetime[0]
      Application started. Press Ctrl+C to shut down.
info: Microsoft.Hosting.Lifetime[0]
      Hosting environment: Development
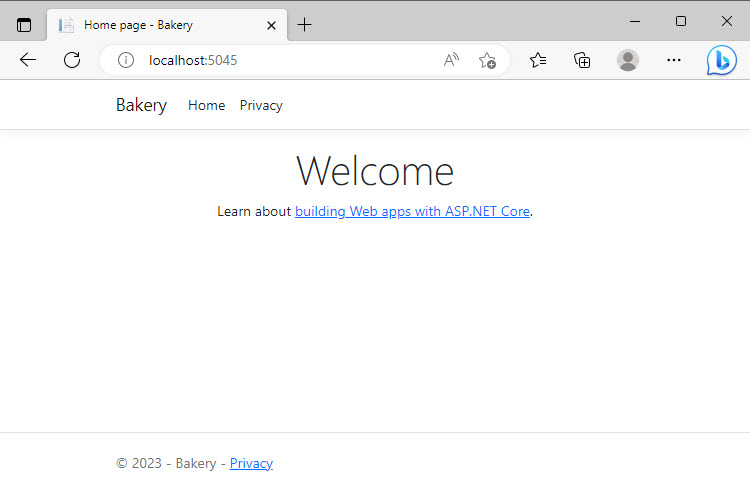
Open a browser and navigate to http://localhost:5045. The site should appear like this:
Summary
At this point, you have used the .NET Core SDK and Visual Studio Code to create a new Razor Pages application. You have reviewed the contents of the project folder, and you have launched the application in a browser. In the next section, you will add a new page and begin customising the site content.
Next: Adding a New Page
