This section describes how to add email sending functionality to your Razor Pages web application. The .NET framework provides a number of APIs in the System.Net.Mail namespace for creating and sending email messages. However, the SmtpClient class, which is a core System.Net.Mail API, is obsolete on some platforms and is not recommended for use on others. Therefore, it is advisable to use a third-party library instead. The official documentation specifically mentions Mailkit as an option. This section will use Mailkit to send emails.
In the last section, you added a basket icon to the layout that dsplays the number of items currently being ordered. In this section, you will link the icon to a checkout page, which you will create next. The checkout page will display the contents of the basket, and include the form that you initially created in the forms section to collect the customer's email and shipping address.
First, open the /Pages/Shared/Components/Basket/Default.cshtml file and change the button to an anchor tag helper that has an asp-page attribute value of "/Checkout":
<a asp-page="/Checkout" class="btn btn-sm btn-primary position-relative" title="@Model.NumberOfItems items in basket">
    <i class="bi bi-cart4"></i>
    <span class="position-absolute top-0 start-100 translate-middle badge rounded-pill bg-danger">
        @Model.NumberOfItems
    </span>
</a>
This won't link anywhere just yet because the Checkout page doesn't exist. That's the next job. Execute the following command to create the Checkout page:
dotnet new page -o Pages -n Checkout -p:n Bakery.Pages
Clicking the basket icon will result in a GET request for the Checkout page, so you will generate the initial state of the page in the OnGetAsync handler. You will retrieve the Id values of the selected products from the basket cookie, and use that to filter the product information that you retrieve from the database for display on the page. Here is the CheckoutModel class featuring an injected BakeryContext, which is used to retrieve the data from the database and then assign it to a List<Product> property:
using System.Text.Json;
using Bakery.Data;
using Bakery.Models;
using Microsoft.AspNetCore.Mvc.RazorPages;
using Microsoft.EntityFrameworkCore;

namespace Bakery.Pages;

public class CheckoutModel : PageModel
{
    private readonly BakeryContext context;
    public CheckoutModel(BakeryContext context)
    {
        this.context = context;
    }
    public Basket Basket { get; set; } = new();
    public List<Product> SelectedProducts { get; set; } = new ();
    public async Task OnGetAsync()
    {
        if(Request.Cookies[nameof(Basket)] is not null)
        {
            Basket = JsonSerializer.Deserialize<Basket>(Request.Cookies[nameof(Basket)]);
            if(Basket.NumberOfItems > 0)
            {
                var selectedProducts = Basket.Items.Select(b=> b.ProductId).ToArray();
                SelectedProducts = await context.Products.Where(p => selectedProducts.Contains(p.Id)).ToListAsync();
            }
        }
    }

}
Next, amend the Checkout.cshtml file to display the contents of the basket (SelectedProducts) in a table:
@page
@model Bakery.Pages.CheckoutModel
<h1 class="fw-light">Checkout</h1>
@if (Model.Basket.NumberOfItems > 0)
{
    <table class="table table-borderless">
        <thead>
            <tr>
                <th>Item</th>
                <th>Quantity</th>
                <th>Cost per unit</th>
                <th class="text-end">Total</th>
            </tr>
        </thead>
        <tbody>
            @foreach (var item in Model.Basket.Items)
            {
                <tr>
                    <td>@Model.SelectedProducts.First(x => x.Id == item.ProductId).Name</td>
                    <td>@item.Quantity</td>
                    <td>@item.UnitPrice</td>
                    <td class="text-end">@(item.Quantity * item.UnitPrice)</td>
                </tr>
            }
        </tbody>
        <tfoot class="border-top">
            <tr>
                <td>Total</td>
                <td></td>
                <td></td>
                <td class="text-end">@Model.Basket.Items.Sum(x => x.Quantity * x.UnitPrice)</td>
            </tr>
        </tfoot>
    </table>
}
else
{
    <p>Your basket is currently empty</p>
}
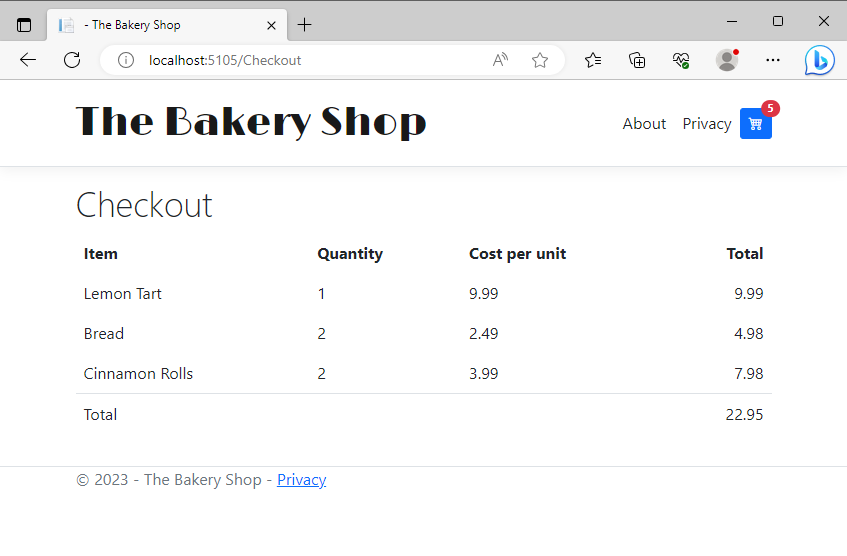
The contents of your basket may vary but when you click on the basket icon, the page should look similar to this:
The form is next. You will need to add using directives for Microsoft.AspNetCore.Mvc and System.ComponentModel.DataAnnotations to the top of the CheckoutModel class, along with properties for the ShippingAddress, OrderEmail and Confirmation from the previous form:
[BindProperty, Required, Display(Name ="Your Email Address")]
public string OrderEmail {get;set;}
[BindProperty, Required, Display(Name ="Shipping Address")]
public string ShippingAddress { get; set; }
[TempData]
public string Confirmation { get; set; }
Then you can add the form itself to the Checkout.cshtml page. Add the following just after the closing </table> tag:
<form method="post">
    <div class="form-group mb-3">
        <label asp-for="OrderEmail" class="form-label"></label>
        <input asp-for="OrderEmail" class="form-control" />
        <span asp-validation-for="OrderEmail" class="text-danger"></span>
    </div>
    <div class="form-group mb-3">
        <label asp-for="ShippingAddress" class="form-label"></label>
        <textarea asp-for="ShippingAddress" class="form-control"></textarea>
        <span asp-validation-for="ShippingAddress" class="text-danger"></span>
    </div>
    <div class="d-flex justify-content-center">
        <button class="btn btn-success"><i class="bi bi-rocket-takeoff"></i> Ship Order</button>
    </div>
</form>
Don't forget the unobtrusive validation scripts:
@section scripts{
    <partial name="_ValidationScriptsPartial"/>
}
Now you get to the meat of this section - generating an email when the user submits a valid form.
The first step is to install Mailkit:
dotnet add package Mailkit
Next, you need to choose a strategy for testing the successful generation of emails. You could use an external email service such as provided by Google or Microsoft via their Outlook/Hotmail/Live services. The downside of this appoach is latency. It can take some time for emails to arrive. Ideally, you want to work with a local service where generated emails are available immediately. You could emulate the SpecifiedPickupDirectory delivery method from System.Net.Mail - an option that allows you to specify a local directory where emails are created as .eml files. This option is not built in to Mailkit, but the code for writing mails to a folder is available here.
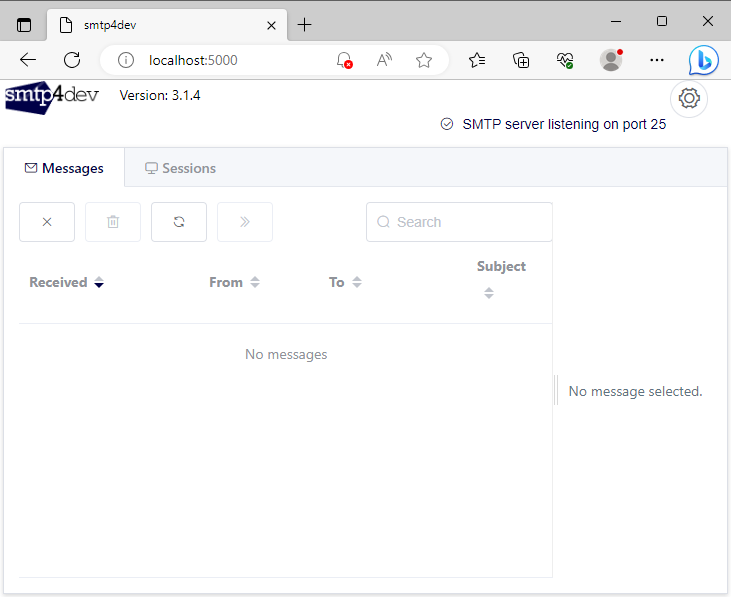
Alternatively, you can install Smtp4Dev - a service that emulates an SMTP server for local development. Installation instructions can be found at the project's repository, but it is as simple as executing the following command to install the tool globally:
dotnet tool install -g Rnwood.Smtp4dev
Then to run the service, type smtp4dev at the command prompt. The interface is web-based, and is accessible by default at http://localhost:5000. You can configure a different port. Check the docs for options.
Add an OnPost`` handler to the CheckoutModel`` class with the following code that deserialises the basket cookie and uses its data to construct a message. It then uses the Mailkit APIs to create an instance of the MimeMessage class which represents an email, and then sends it using its own SmtpClient class. Finally, the code expires the cookie:
public async Task<IActionResult> OnPostAsync()
{
    if(ModelState.IsValid && Request.Cookies[nameof(Basket)] is not null){
        var basket = JsonSerializer.Deserialize<Basket>(Request.Cookies[nameof(Basket)]);
        if(basket is not null)
        {
            var plural = basket.NumberOfItems == 1 ? string.Empty : "s";
            Confirmation = $@"<p>Your order for {basket.NumberOfItems} item{plural} has been received and is being processed:</p>
            <p>It will be sent to {ShippingAddress}. We will notify you when it has been despatched</p>";
            var message = new MimeMessage();
            message.From.Add(MailboxAddress.Parse("[email protected]"));
            message.To.Add(MailboxAddress.Parse(OrderEmail));
            message.Subject = "Your order confirmation";

            message.Body = new TextPart("html")
            {
                Text = Confirmation
            };
            using var client = new SmtpClient ();
            await client.ConnectAsync("localhost");
            await client.SendAsync(message);
            await client.DisconnectAsync(true);
            Response.Cookies.Append(nameof(Basket), string.Empty, new CookieOptions{Expires = DateTime.Now.AddDays(-1)});
            return RedirectToPage("/OrderSuccess");
        }
    }
    return Page();
}
If the form is valid, the user is redirected to the OrderSuccess page you created earlier. However, this time the content of the TempData item being passed to that page is now HTML. By default, Razor encodes all HTML, so you need to make a change to OrderSuccess.cshtml to prevent this. You will use the Html.Raw`` method to render the HTML as is. Change the line under the h1` heading as shown here:
<h1>Order Confirmation</h1>
@Html.Raw(TempData[nameof(OrderModel.Confirmation)])
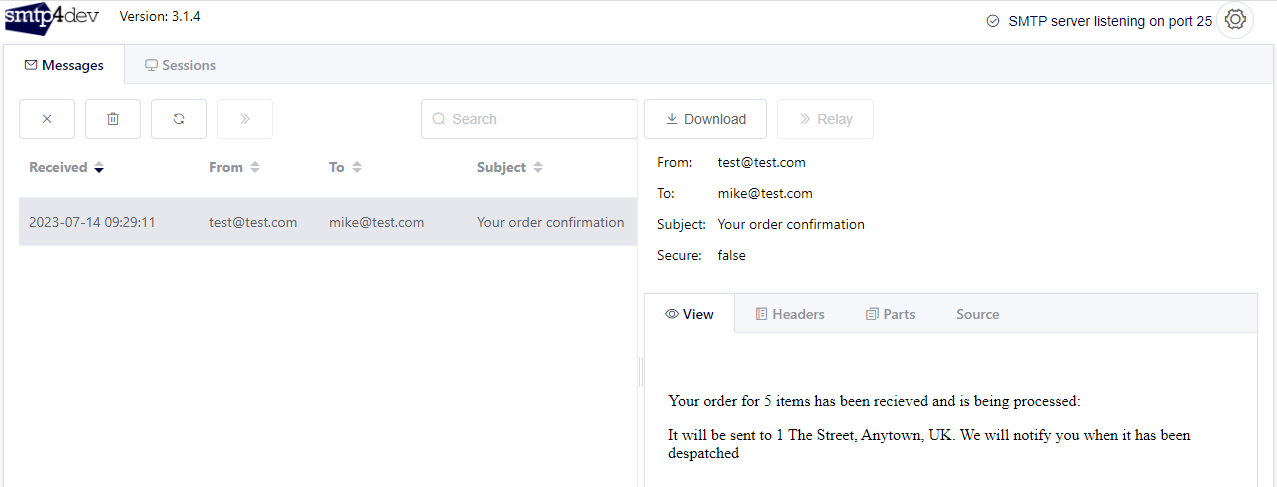
Run the app and if there are no items in the basket, select one or two. Then click on the basket icon and go to the checkout page where you can complete and submit the order. You should see the confirmation message appear in the OrderSuccess page and in an email that appears in the Smtp4Dev UI:
Summary
Now that you have reached this point, the port from the ASP.NET Web Pages Bakery template is complete. The Razor Pages version is available on Github, but things do not stop there. Further sections are planned which will cover more Razor Pages functionality. Once completed, the next section will look at scaffolding CRUD pages so that you can add more products to the database, and modify the existing ones.
Previous: Working With Forms
Next: Scaffolding CRUD pages
