In the previous section, you created a model - a representation of the entities that your application is concerned with. Then you installed and configured EF Core to manage communication between the model and a database which doesn't actually exist yet.
When developing applications, the model is likely to change often as new requirements come to light. Once created, the database needs to be kept in sync with the model. The Entity Framework Core migrations feature enables you to make changes to your model and then propagate those changes to your database schema. The migrations feature can also be used to create the database if it doesn't exist.
Configure the model
EF Core migrations are based on a set of conventions. The conventions govern how DbSet objects are mapped to tables in the database, how properties are mapped to columns, how .NET data types are mapped to suitable types exposed by the database provider and how keys and indexes are created and managed.
In this tutorial series, you will rely largely on conventions to manage mapping. Entities will map to database tables and properties will map to columns based in their names. Sometimes the conventions don't satisfy your needs, or EF Core is unable to determine your intentions. In these cases, you can use configuration to tell EF Core what you want.
Configuration can be applied in two ways; through decorating classes and properties with attributes, or by using the Fluent API. Attributes only provide a subset of configuration options. Therefore for any reasonably complex model, you are likely to rely on the fluent API for at least part of your configuration. Consequently it makes sense to use fluent API for all configuration, thereby keeping your configuration code consistent, in one place and therefore easier to maintain.
So where should you put your fluent API configuration code?
You have two options: you can place it directly in the OnModelCreating method of your DbContext class; or you can place configuration code on separate classes per entity. You will adopt the latter approach because it is the recommended way to manage configurations.
Add a new folder to the Data folder and name it Configurations. Then add a new C# class file named ProductConfiguration.cs to the Configurations folder. Replace the content with the following:
using Bakery.Models;
using Microsoft.EntityFrameworkCore;
using Microsoft.EntityFrameworkCore.Metadata.Builders;

namespace Bakery.Data
{
    public class ProductConfiguration : IEntityTypeConfiguration<Product>
    {
        public void Configure(EntityTypeBuilder<Product> builder)
        {
            builder.Property(p => p.ImageName).HasColumnName("ImageFileName");
        }
    }
}
The class implements the IEntityTypeConfiguration<TEntity> interface which has one method: Configure. Configurations are defined in this method. The default mapping convention is to map to columns that have the same name as the property. In this example, you use the HasColumnName method to instruct the context to map the ImageName property to a column named "ImageFileName".
The configuration class is registered in the OnModelCreating method of BakeryContext as shown in the highlighted section:
public class BakeryContext : DbContext
{
    public DbSet<Product> Products { get; set; }

    protected override void OnConfiguring(DbContextOptionsBuilder optionsBuilder)
    {
        optionsBuilder.UseSqlite(@"Data source=Bakery.db");
    }

    protected override void OnModelCreating(ModelBuilder modelBuilder)
    {
        modelBuilder.ApplyConfiguration(new ProductConfiguration());
    }
}
Create Seed Data
When you use a migration to create a database, it will start off empty empty - unless you "seed" it with data at the time that the migration is executed. In this section, you will use the HasData configuration method to achieve this.
Create a new C# class file in the Data folder and name it ModelBuilderExtensions.cs. Replace the content with the following code:
using Bakery.Models;
using Microsoft.EntityFrameworkCore;

namespace Bakery.Data;

public static class ModelBuilderExtensions
{
    public static ModelBuilder Seed(this ModelBuilder modelBuilder)
    {
        modelBuilder.Entity<Product>().HasData(
        new Product
        {
            Id = 1,
            Name = "Carrot Cake",
            Description = "A scrumptious carrot cake encrusted with sliced almonds",
            Price = 8.99m,
            ImageName = "carrot-cake.jpg"
        },
        new Product
        {
            Id = 2,
            Name = "Lemon Tart",
            Description = "A delicious lemon tart smothered with juicy fresh fruit",
            Price = 9.99m,
            ImageName = "lemon-tart.jpg"
        },
        new Product
        {
            Id = 3,
            Name = "Cupcakes",
            Description = "Delectable vanilla and chocolate cupcakes",
            Price = 5.99m,
            ImageName = "cup-cakes.jpg"
        },
        new Product
        {
            Id = 4,
            Name = "Bread",
            Description = "Fresh baked French-style bread, bagettes and cobs",
            Price = 2.49m,
            ImageName = "bread.jpg"
        },
        new Product
        {
            Id = 5,
            Name = "Bagels",
            Description = "Deliciously chewy freshly made New York-style bagels.",
            Price = 5.99m,
            ImageName = "bagels.jpg"
        },
        new Product
        {
            Id = 6,
            Name = "Chocolate Cake",
            Description = "Rich chocolate frosting cover this chocolate lover's dream",
            Price = 8.99m,
            ImageName = "chocolate-cake.jpg"
        },
        new Product
        {
            Id = 7,
            Name = "Brownies",
            Description = "Fudgy, gooey and super chocolaty with a crispy top",
            Price = 5.99m,
            ImageName = "brownie.jpg"
        },
        new Product
        {
            Id = 8,
            Name = "Sweet Buns",
            Description = "Sweet, light, airy and perfect with your afternoon tea",
            Price = 3.49m,
            ImageName = "buns.jpg"
        },
        new Product
        {
            Id = 9,
            Name = "Cheesecake",
            Description = "Creamy and vibrant lemon cheesecake made with organic lemons",
            Price = 2.49m,
            ImageName = "cheesecake.jpg"
        },
        new Product
        {
            Id = 10,
            Name = "Chocolate Cookies",
            Description = "Crisp on the outside, soft on the inside and full of chocolate chips",
            Price = 3.49m,
            ImageName = "chocolate-chip.jpg"
        },
        new Product
        {
            Id = 11,
            Name = "Cinnamon Rolls",
            Description = "Big, fluffy, soft and delicious with warming cinnamon",
            Price = 3.99m,
            ImageName = "cinnamon-roll.jpg"
        },
        new Product
        {
            Id = 12,
            Name = "Croissants",
            Description = "Flaky and buttery, perfect for savoury or sweet",
            Price = 3.49m,
            ImageName = "croissant.jpg"
        },
        new Product
        {
            Id = 13,
            Name = "Doughnuts",
            Description = "Traditional ring doughnuts with a variety of toppings",
            Price = 5.49m,
            ImageName = "doughnuts.jpg"
        },
        new Product
        {
            Id = 14,
            Name = "Fruit Loaf",
            Description = "Packed full with ony the juiciest, plumpest fruit",
            Price = 8.49m,
            ImageName = "fruit-loaf.jpg"
        },
        new Product
        {
            Id = 15,
            Name = "Fruit Tart",
            Description = "Light pastry with a selection of the freshest fruit",
            Price = 6.49m,
            ImageName = "fruit-tart.jpg"
        },
        new Product
        {
            Id = 16,
            Name = "Lemon Meringue",
            Description = "Zingy lemon on a light pastry covered with light clouds of meringue",
            Price = 10.99m,
            ImageName = "lemon-meringue.jpg"
        },
        new Product
        {
            Id = 17,
            Name = "Macaron",
            Description = "Tiny, delicate meringue pillows with a variety of fillings",
            Price = 9.99m,
            ImageName = "macaron.jpg"
        },
        new Product
        {
            Id = 18,
            Name = "Pain Au Chocolate",
            Description = "The lighest pastry shot through with top quality chocolate",
            Price = 4.49m,
            ImageName = "pain-au-chocolate.jpg"
        },
        new Product
        {
            Id = 19,
            Name = "Cornish Pasty",
            Description = "A meaty treat based on traditional Cornish recipes",
            Price = 5.99m,
            ImageName = "pasty.jpg"
        },
        new Product
        {
            Id = 20,
            Name = "Sliced Bread",
            Description = "Our top quality loaves sliced for your convenience",
            Price = 2.49m,
            ImageName = "sliced-bread.jpg"
        });
        return modelBuilder;
    }
}
The Seed method is an extension method on the ModelBuilder type, which is passed in to the OnModelCreating method that you worked with earlier. The body of the method uses the HasData method to configure the specified entity with seed data. The values provided for each entity include the key values. SQLite happily accepts values in an autoincrement column if they are provided as part of an INSERT statement. SQL Server, on the other hand, will enable IDENTITY_INSERT on the target table, and then turn it off again once the seed data has been added. Whenever future migrations are applied, EF Core checks seed data against values that already exist in the database, preventing the seed data being applied again. Any new seed data is inserted. If any of the existing seed data values are altered, EF Core executes an UPDATE statement accordingly.
Note
The image files are available in the download that accompanies this tutorial series. Create a folder named images in wwwroot, and within that folder, create another folder called products. Place the product images there. They should then be available at the following relative URL: /images/products/....
The seed method itself is called in the OnModelCreating method. It returns an instance of the ModelBuilder type, enabling it to be chained to other calls that also return the ModelBuilder type. The ApplyConfiguration method that you used to add the product configuration meets this criteria, so you can chain the Seed method to that:
protected override void OnModelCreating(ModelBuilder modelBuilder)
{
    modelBuilder.ApplyConfiguration(new ProductConfiguration()).Seed();
}
Create the migration
Now that the model configuration is complete and provision for seed data has been made, you can create the actual migration. But before you do, you need to install the tools that scaffold the migration code. Use the terminal to execute the following command from within the BakeryShop directory (the one containing the project file):
dotnet add package Microsoft.EntityFrameworkCore.Design
Followed by this one to create the migration:
dotnet ef migrations add CreateDatabase --output-dir Data/Migrations
This creates a migration called CreateDatabase. The files for the migration are generated in a newly created folder named Migrations in the Data folder (as specified by the value passed to the output-dir switch):
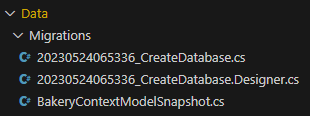
The first file contains C# code that gets translated into SQL statements to be executed, while the snapshot file contains a C# representation of the current model. This is used by subsequent migrations to calculate the changes required to update the schema of the database.
Execute the migration
Having configured and created the migration, it is time to execute it. At the terminal, type the following and press Enter to execute the command:
dotnet ef database update
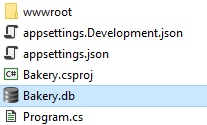
Once you get confirmation that the migration has been applied, you should see a Bakery.db file that has been created in the root of the site:
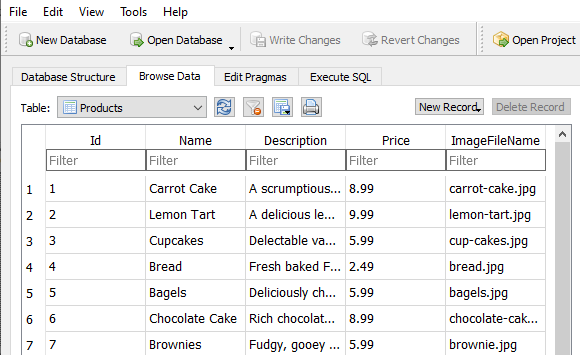
You can open this using a suitable utility. My preferred tool for managing SQLite databases is DB Browser For SQLite. You can explore the generated tables. The __EFMigrationsHistory table contains details of each migration. The products table contains the data that you seeded it with:
Summary
You have learned how to configure a model prior to a migration, generate seed data and then create a migration and execute it. Now that you have a database with data, you can start working with it, and that is what you will do in the next section.
Next: Working with Data
Previous: Creating a model
